Most backyard feeders fail for reasons that have nothing to do with the feeder. They get hung in the strike zone of a window. They get filled with a blend half the yard will not touch. They get sprayed with a hose in October and not taken apart again until March.
I keep the log. Ten years of it now, a spreadsheet with every species that visits the yard, the first-of-season dates for migrants, and how many cups of seed each feeder draws in a week. The log is blunt about what matters, and it is not the powder-coated finish. A backyard bird feeding setup lives or dies on three decisions: where the feeder hangs, what goes inside it, and how often you take the whole thing apart.
The feeder itself is fourth on that list. That surprises people, and it should not. Birds do not care what the housing looks like. They care that the perch sits at a height they can use, that the seed is not moldy, and that nothing with a bushy tail is parked on the tray.
So here is the order I set a station up in, from the window out to the pole, plus the two pieces of hardware I would hang first and the honest caveats that come with each.
Why you should trust me
I am a licensed wildlife rehabilitator in Madison, Wisconsin. I work part time at a small animal clinic and I run the songbird side of a county wildlife rescue out of my garage, which means the incubator lives in the laundry room and the scale lives on the kitchen counter. That is why grams and cups show up in everything I write.
Twelve years of feeding backyard birds, ten years of the log, 214 species on my county list and 38 of them have hit my feeders. I test squirrel claims by letting the neighborhood fox squirrels work on a feeder for three weeks before I say a word about it in print. If a squirrel reaches seed once, the write-up says squirrel-resistant, not squirrel-proof. And every salmonella case I have handled in rehab traced back to a dirty feeder nobody had taken apart since fall, which is why the cleaning section of this guide is longer than the shopping section.
Placement comes before hardware
You can hang the best feeder on the market in the wrong spot and it will kill birds.
The rule I follow comes straight from Audubon and it has held up in my yard for twelve years: a feeder goes either within three feet of the glass or more than thirty feet away from it. The middle ground is the kill zone. A bird that launches from a feeder eight feet out has room to build speed before it hits the pane, and a window strike at that distance is usually fatal even when the bird flies off afterward.
A window feeder three feet from the glass prevents strikes because the bird never gets going fast enough to hurt itself. I learned that the hard way. A white-throated sparrow hit my dining room glass and spent three days recovering in a shoebox on my counter. I hung the first window feeder three feet from that same pane the week I released him.
The other placement rules I do not bend:
- Keep the feeder out of the launch radius of anything a squirrel can jump from. Fence rails, shed roofs, low branches, and the top of a grill all count. If a squirrel can sit there and see the seed, it will eventually make the jump.
- Put the feeder where you can see it from a window you actually sit near. A feeder you cannot watch from the couch is a feeder you will forget to fill.
- Give birds a escape route. A feeder out in the open with no shrub within a short hop is a feeder that feeds hawks.
- Do not hang a nest box on the same pole as a busy feeder. Traffic at the tray stresses nesting birds, and cavity nesters are territorial about the space around a box.
Match the seed before you buy anything
I disqualify a seed blend on the ingredient list alone. If milo or red millet is in the first few ingredients, it goes back on the shelf. Those fillers sit in the tray uneaten, mold in the rain, and force you to clean the platform twice as often as you should. Cheap seed is the most expensive seed you will buy, because you pay for it twice: once at the register and again in cleaning time.
What the log shows birds actually clearing:
- Black oil sunflower for the widest draw. Chickadees, cardinals, finches, nuthatches, and jays all work it.
- Sunflower hearts where you want zero hull litter. The draw per cup is the same as black oil, and there is nothing to sweep off the deck.
- No-mess blends if you feed over a deck, a patio, or anything an HOA can see. You pay more per pound and you buy silence.
- Nyjer in a mesh feeder for goldfinches, and only in a mesh feeder. In a tube it cakes and rots.
- Suet cakes for the clingers: woodpeckers, nuthatches, chickadees. Winter is when suet earns its spot.
Buy sunflower hearts in the biggest bag you can store dry. The price per pound drops hard at bulk size, and a sealed bin in a cool garage keeps them good through a Wisconsin winter.
The two pieces of hardware I would hang first
Two different jobs, two different products. One watches the feeder. One gives the cavity nesters somewhere to go once the feeding station is busy.
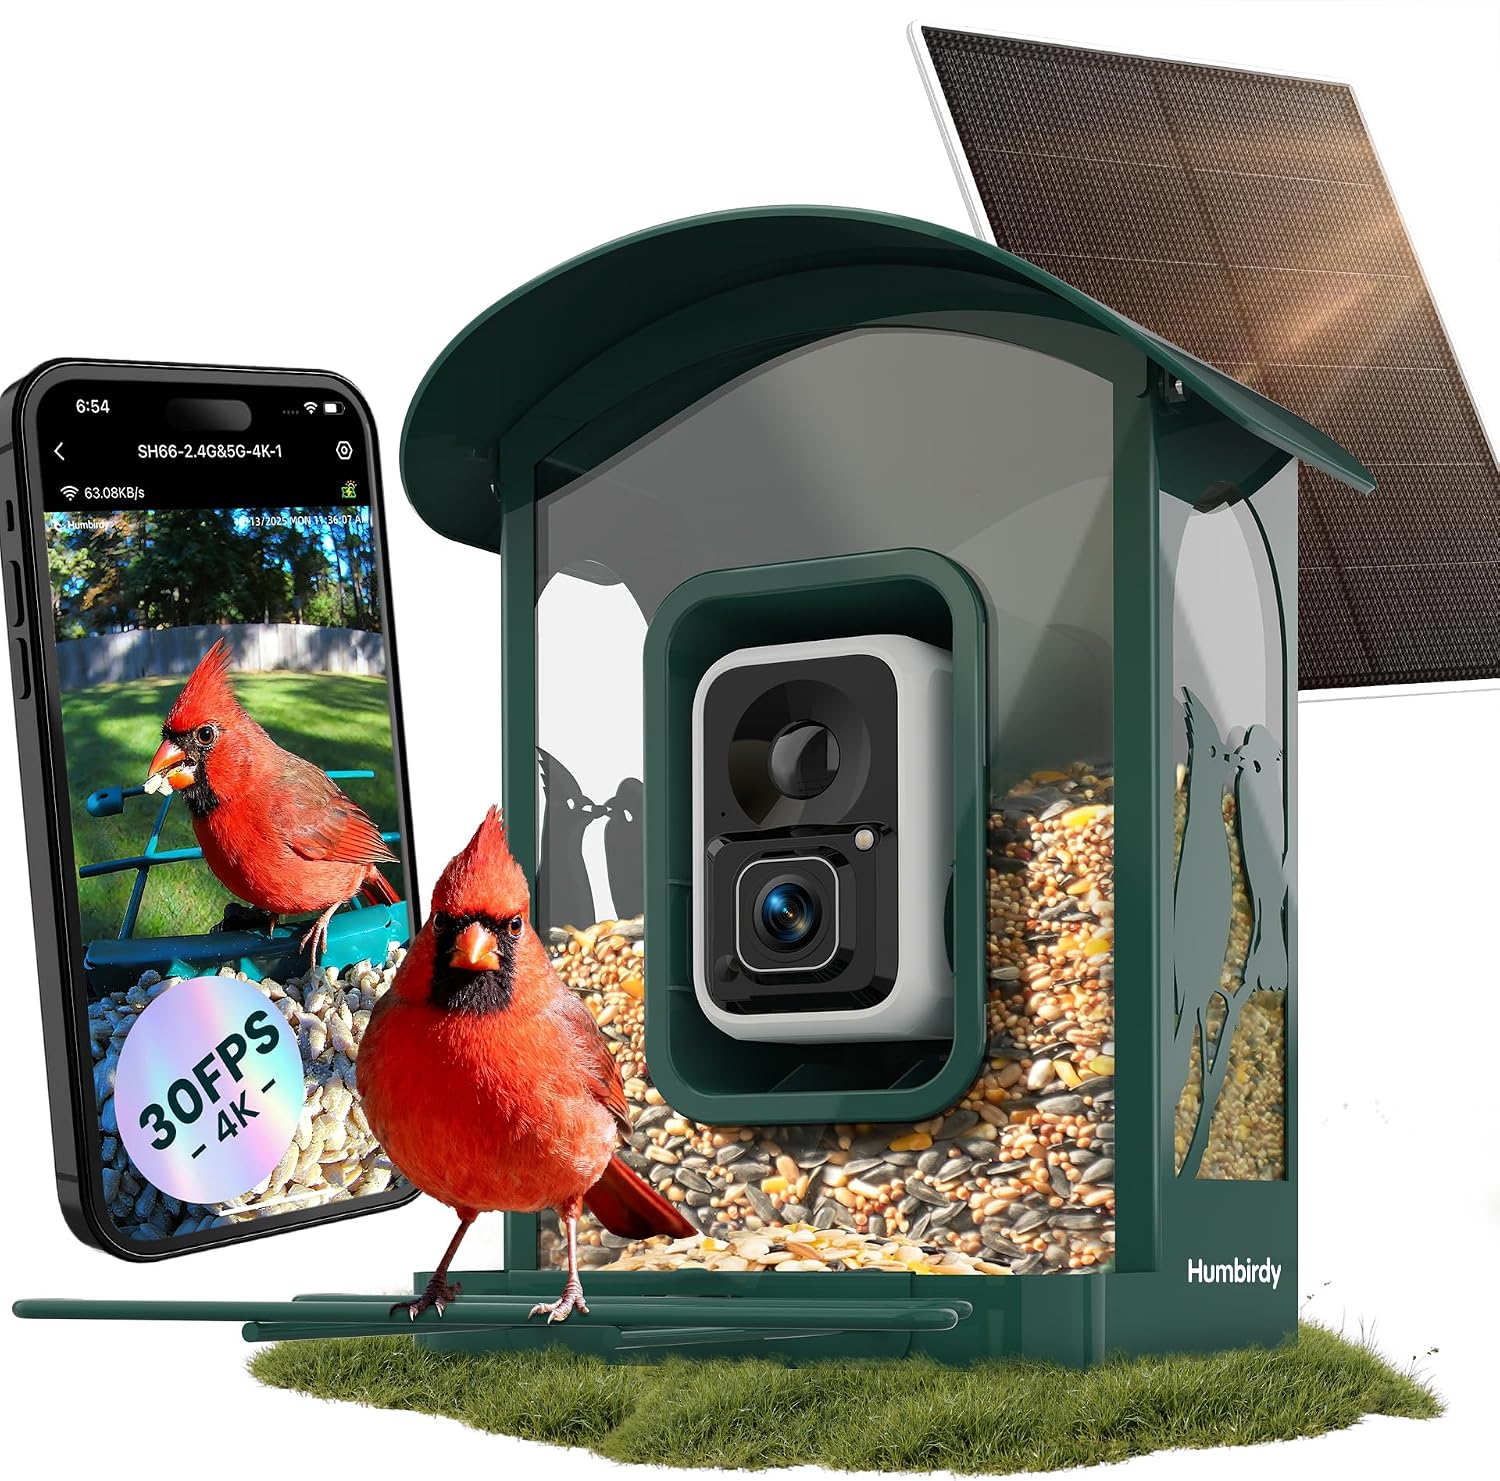
The recording pick: Bird Feeder with Camera, 4K Ultra HD Video with 30fps Live View, 10x Slow Motion, No Subscription, Solar Powered AI Smart Bird Feeder with Camera, 2.4G/5G Wi-Fi, Durable Metal,Bird Lover Gift
 Visit on Amazon →
The spec I check first on any camera feeder is the subscription line, and this one is listed as no subscription. That matters more than resolution to anyone who has watched a camera turn into a paperweight the month a payment lapsed. I refuse to pay a monthly fee to watch my own yard, and I say so every time someone asks me about smart feeders.
The rest of the listing lines up with what I want in a feeder camera. It records 4K Ultra HD at 30fps with live view, which is enough frame rate to catch a bird that lands and leaves in under a second. The 10x slow motion is the feature I would use most, because half of backyard birding is identifying something that was on the perch for two seconds and then gone. The AI labeling does the first pass on ID, and you still verify against Sibley, because the AI is a filter, not an ornithologist.
Two practical specs matter for a feeder that hangs outside year round. The housing is metal, which is the difference between a feeder that survives a freeze-thaw cycle and one that cracks at the mount in February. And it is solar powered, so you are not pulling a battery pack off a pole in single-digit wind chill. It runs on 2.4G and 5G Wi-Fi, which matters if your router pushes everything to the 5G band and your old camera feeder only spoke 2.4.
Flaws but not dealbreakers: A camera feeder is still a feeder, so it needs the same placement rule as everything else. Put it in the strike zone and you will get great footage of a bird hitting your window. Keep the solar panel clear of snow in winter, because a buried panel is a dead camera.
Anyone who wants a species record from the kitchen table, without a subscription hanging over it, should start here.
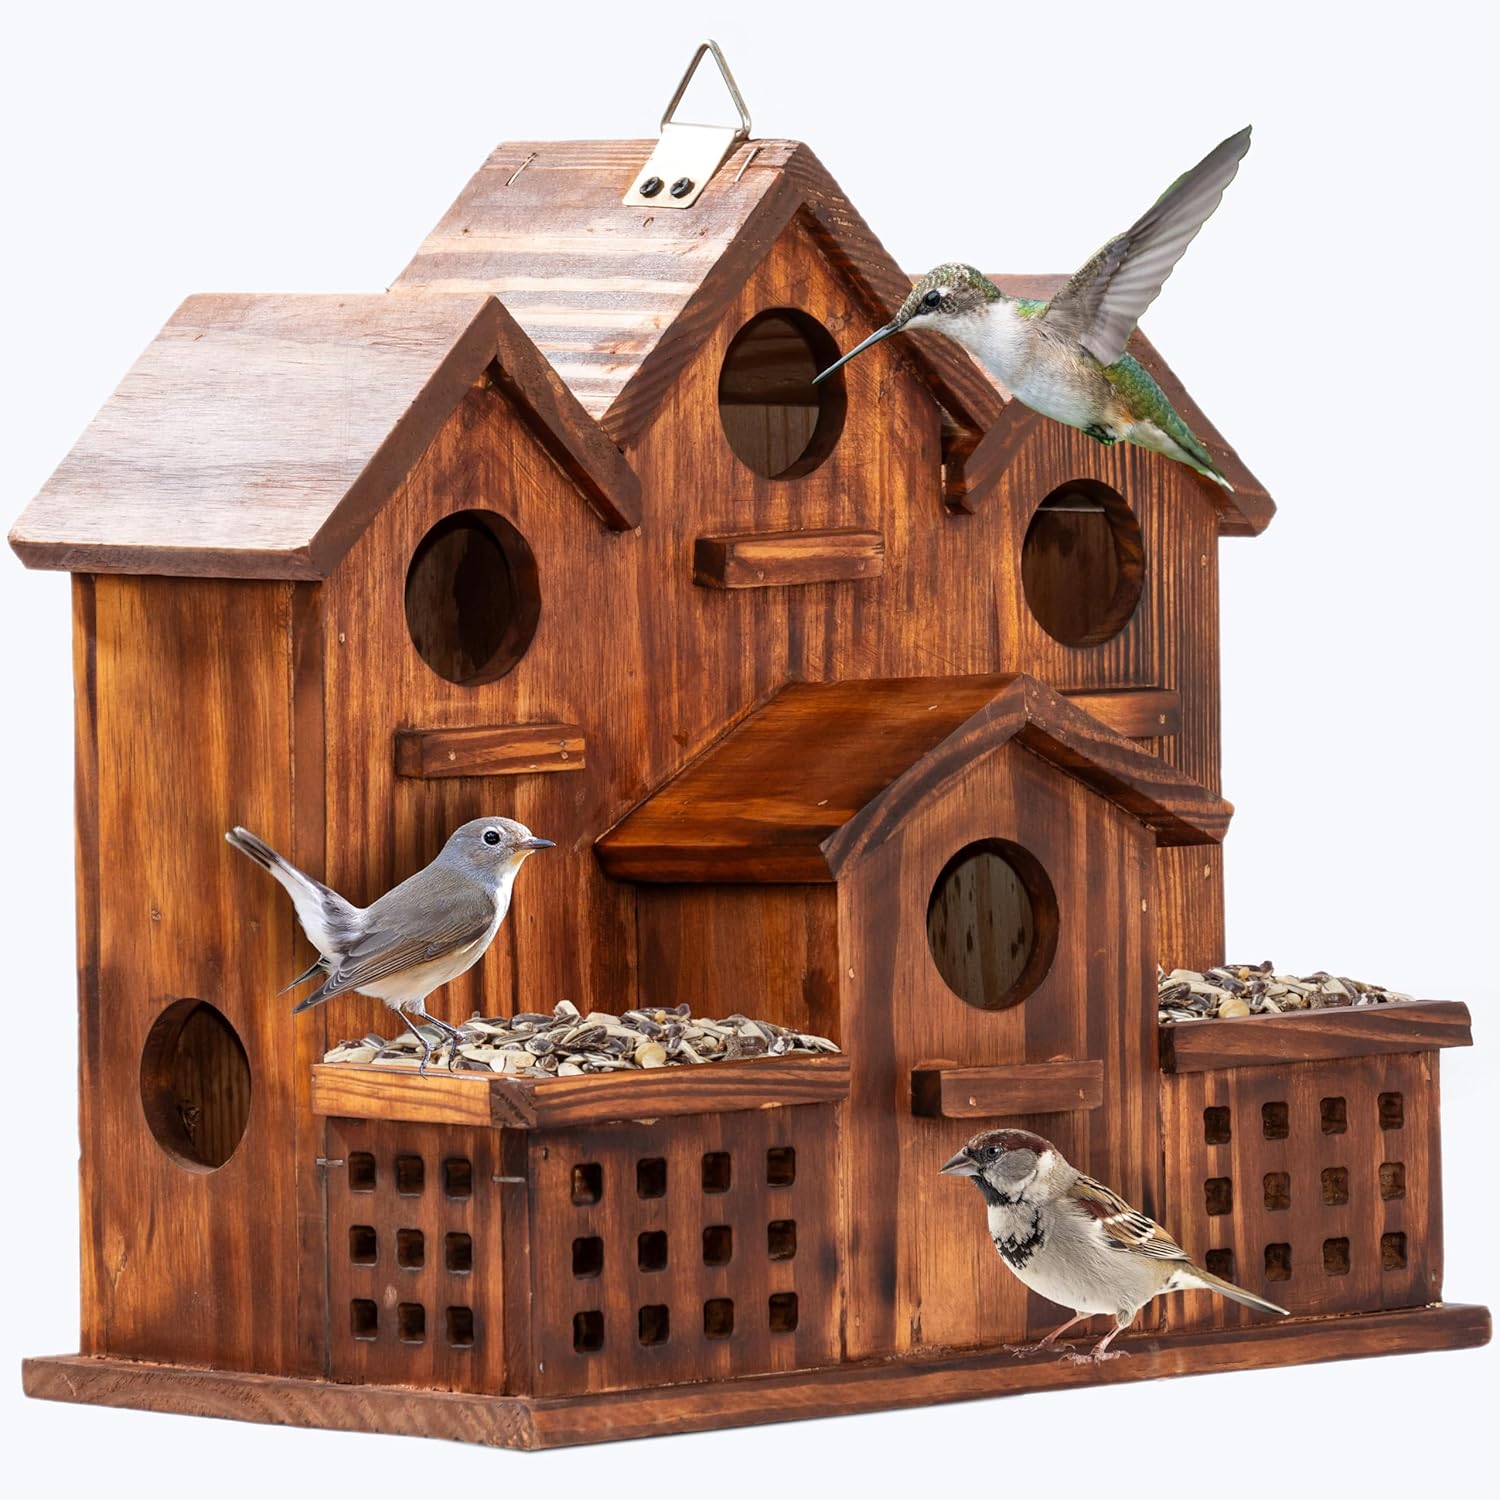
The nesting pick: MIXUMON Bird House Outdoor with Feeder, 6-Room Wooden Birdhouse for Outdoors & Outside, Carbonized Pine Wood Bird Houses with 1.57” Entrance & Easy Clean-Out Doors (Natural Wood Door)
 Visit on Amazon →
Cavity nesters are the birds most likely to disappear from a yard as it gets built up, because they need a hole in a tree and mature trees keep coming down. A nest box is how you put that hole back. This one is carbonized pine, which is pine that has been heat treated, and heat treated wood holds up to weather better than raw pine without a coat of stain every other year.
The 1.57 inch entrance is sized for the smaller cavity nesters, the chickadee and wren and nuthatch class of bird. Be honest about what an entrance that size does and does not do: no entrance dimension keeps house sparrows out, and house sparrows are the reason you monitor a box instead of hanging it and walking away. Check the box weekly through the nesting season, and if sparrows move in, clear the nesting material and keep clearing it. That is the job.
The easy clean-out doors are the feature that decides whether this box gets used for more than one season. A nest box you cannot open is a box full of old nesting material, parasites, and droppings by August. You open it, you scrape it, you rinse it, you let it dry in the sun, and you close it up for winter.
Flaws but not dealbreakers: Six rooms sounds like six nesting pairs, and it will not be. Cavity nesters defend territory, so expect one or two rooms occupied and the rest used as shelter and roost space, which is still worth having on the property. Mount it on a post or a shed wall facing away from prevailing weather and afternoon sun, not on the same pole as your busiest feeder.
Anyone with a yard that has lost its old trees, and who wants bluebirds, wrens, and chickadees to have somewhere to go, should hang one of these before spring.
The setup, step by step
Step one: pick the window. Walk the inside of the house and find the pane you sit near most. That pane decides everything. The feeder goes three feet from it, or the pole goes more than thirty feet out.
Step two: choose the mount. A window feeder needs a bracket that bolts through the sill or a metal arm that clamps solid. Suction cups are for screened porches in July, not for a Wisconsin January. I have watched a cup let go at six below and send a full tray onto the porch.
Step three: set the pole or post. A ground pole with a baffle below the feeder is the setup that survives squirrels. The baffle goes on the pole, not on the feeder, and it needs clearance above the ground so nothing can climb past it from a launch point.
Step four: hang the hardware. The camera feeder goes on the pole at a height you can reach without a ladder, because you will be refilling it weekly and pulling it down to clean. The nest box goes on a separate post or a wall, away from the busiest tray.
Step five: fill it right. One seed type per feeder for the first month. If you mix everything together you will never learn what is drawing birds and what is being ignored, and the log will be useless.
Step six: run a baseline week. Fill the feeder, level the seed, and weigh or measure what you put in. At the end of the week, measure what is gone. That number is your draw, and it is the only honest way to compare one feeder to another or one seed blend to another.
Step seven: put a cleaning day on the calendar. Same day every week, in pen, not pencil. Everything else in this guide is optional compared to that one appointment.
Cleaning is the part that keeps birds alive
A dirty feeder is a disease vector with a perch. I have seen house finch eye disease and salmonella in rehab intakes, and every case traced back to a feeder nobody had taken apart in months.
The protocol I use, and the one I would hand to anyone who asks:
- Take the feeder completely apart. Not a rinse. Apart.
- Wash it in warm soapy water and scrub the ports, the perches, and the seams where seed dust packs in.
- Soak it in a diluted bleach solution, one part bleach to nine parts water, for a few minutes. Rinse until you cannot smell bleach.
- Dry it fully in the sun or on a rack before it goes back up. Damp seed in a damp feeder is mold in a day.
- Sweep the ground under the feeder. Hulls and droppings pile up there and draw rodents and disease.
- Do this weekly in warm or wet weather, and every two weeks in a hard freeze.
If you see a sick bird at the feeder, take every feeder down for two weeks, clean them all, and let the yard empty out. That gap is what breaks a outbreak. It is also the single hardest piece of advice I give, because an empty feeder in May feels like a failure. It is not. It is the job.
Winterizing a Wisconsin station
Winter is when the log fills up, and it is also when hardware fails.
Suet goes up in November and stays up until the first real warm spell. It is the highest calorie thing on the pole, and the woodpeckers, nuthatches, and chickadees that work it are the birds that stay all winter. Vinyl coated wire baskets will not cut feet the way bare metal does.
Water matters more than seed in a hard freeze. A heated bath keeps the water open when everything else in the county is ice, and open water brings in species that never touch a seed feeder. Check the wattage and the thermostat before you buy any heated bath. A bath that runs hot is a hazard, not a feature.
Keep the solar panel on a camera feeder clear of snow. A buried panel is a camera that stops recording, and the whole point of hanging one is the footage.
Expect the freeze-thaw cycle to find every weakness. Seed that gets wet and then freezes into a block will not come out of a tube. Metal housings survive that. Thin plastic does not. And check your mount hardware in January, because the expansion and contraction of a hard winter loosens bolts that were tight in October.
What this actually costs you
I am not going to quote you a price, because prices move and the math that matters is not the sticker. It is the cups per week.
A feeder that draws two cups a week costs you more in seed over a winter than a feeder that draws half a cup, and that is not automatically bad. A busy feeder is a busy feeder. What you want to avoid is the feeder that holds five cups, gets ignored, and turns into a mold experiment you clean twice as often as the busy one. The log answers that question in one month.
The other cost is time, and it is small. Twenty minutes a week for cleaning, ten minutes to refill, and a couple of minutes a day watching the tray. Call it half an hour a week for a yard that ends up on your county list.
The mistakes that empty the log
- Filler seed. Milo and red millet get ignored, mold, and force extra cleanings. Read the ingredient list.
- Hose-spray cleaning. That is not cleaning. Take the feeder apart or take it down.
- Suction cups through a freeze. They let go, and the tray lands on the porch.
- A feeder in the strike zone. Eight feet from the glass is the worst possible distance.
- Everything down in June. Bird feeding is a year round job. The log's best months are May and June, when the migrants come through and the yard gets loud.
- A nest box nobody opens. If you cannot clean it out, do not hang it.
Start with the window, then the seed, then the hardware. Put the cleaning day on the calendar in pen. Do that and the log fills itself, one cup at a time, and ten years from now you will have a spreadsheet that tells you more about your yard than any product page ever could.